Information Architecture Design: A Step-By-Step Guide
Information architecture is a discipline that focuses on organizing information within digital products clearly and logically. It helps users answer the question, “Where can I find the information I’m looking for?”
This guide will discuss 10 steps you need to go through to design information architecture for your product.
Step 1: Understand user goals
In product design, it is essential to understand who you are designing for. People look for information in different ways, and different people look for different kinds of information. You need to understand what users are trying to achieve using your product.
You need to find the answer to the questions:
- Who will be using a product?
- What are they going to do?
- What do they want to achieve?
Its vital to invest in user research. Through research, information architects can learn how the target audience thinks when they interact with a product, and this will help them organize the information in a way that meets the user’s needs.
You should create user personas (archetypes of idea users).
and define the mental models of your users. You need to structure the information based on the mental models. Show exactly what users expect to see at places where they expect to see it.
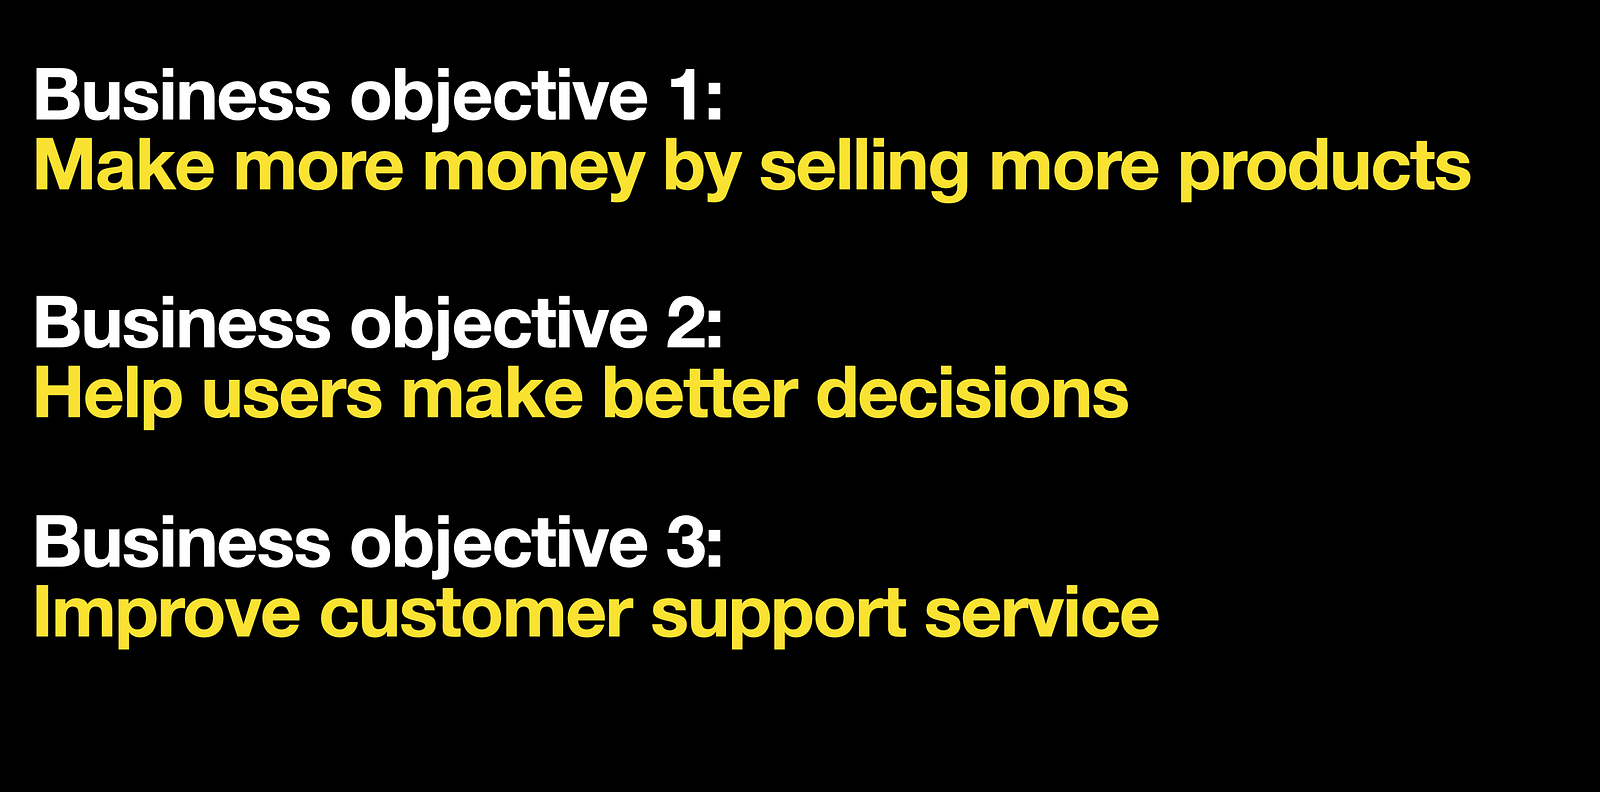
Step 2: Define business objectives
After identifying user goals, you need to understand how information architecture should help the company achieve business goals. It is better to conduct a brainstorming session with stakeholders to set clear business objectives. You need to identify primary and secondary business goals.
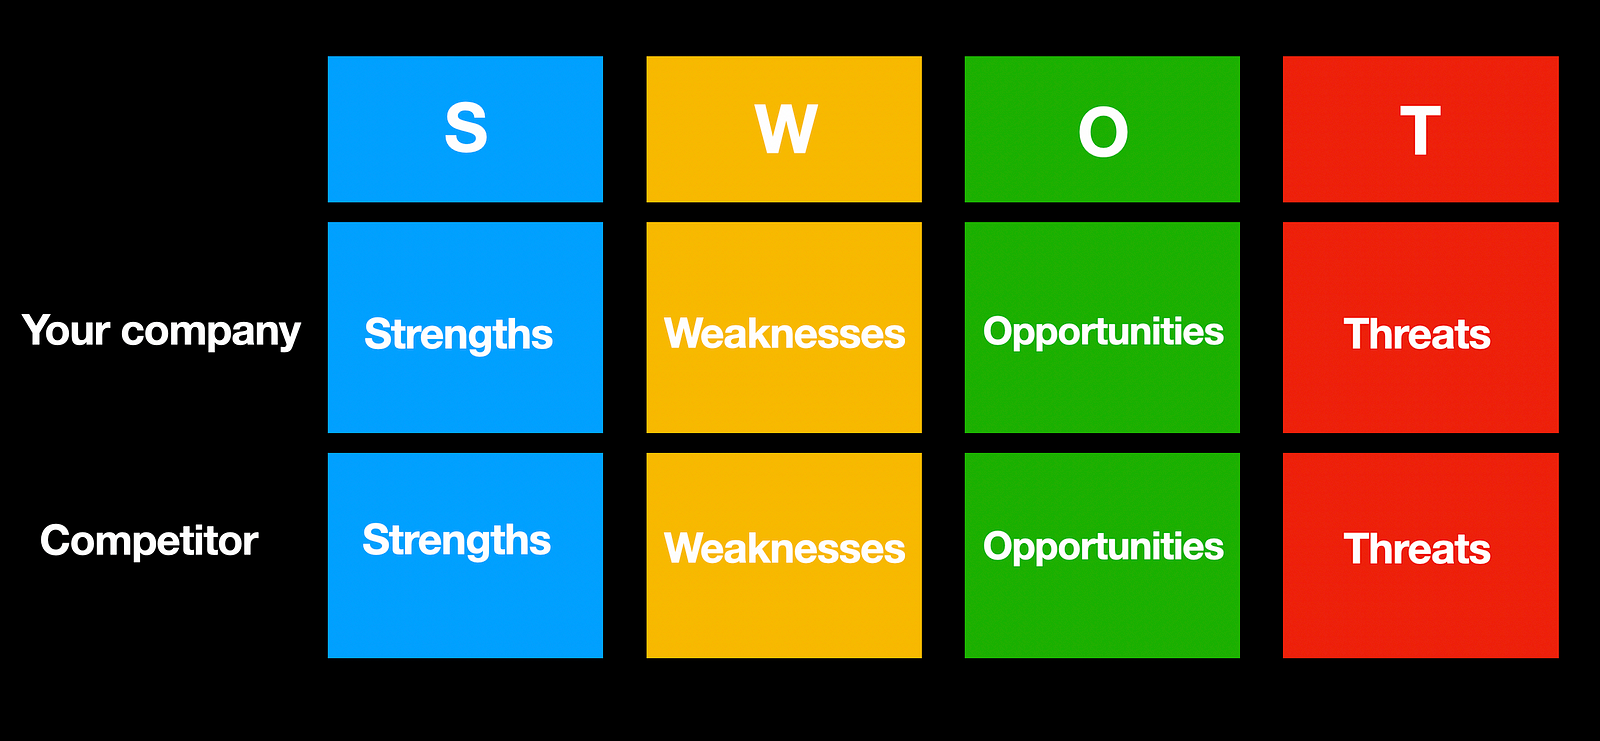
Step 3: Conduct competitor analysis
After you define user and business goals, it’s time to conduct competitor analysis. The information architecture design should be based on your users’ expectations about your product, and an analysis of similar products available on the market will give you an idea of what your customers expect. Take a look at what your competitors are doing and conduct a SWOT analysis: your goal is to identify the strengths and weaknesses of the content organization that your competitors have. It will help you to identify opportunities that you can explore.
Step 4: Define content
Next, you need to define your content. Information architects should have a good understanding of the content that the product offers. If you are redesigning an existing product, you should conduct content inventory first. Below you can see a template for a content inventory spreadsheet for websites. It typically includes page ID, page level in the hierarchy, URL, content type, keywords, and description.

Collect all content that your product has and then conduct a content audit — decide what you want to keep and remove (based on user and business needs).
Step 5: Categorize & prioritize content
Then you need to categorize and prioritize content. You need to decide what content should go on the website. Categorize content and group similar content together to create logical chunks. Web analytics tools like Google Analytics and techniques like card sorting and contextual inquiries will help you learn how to structure content.
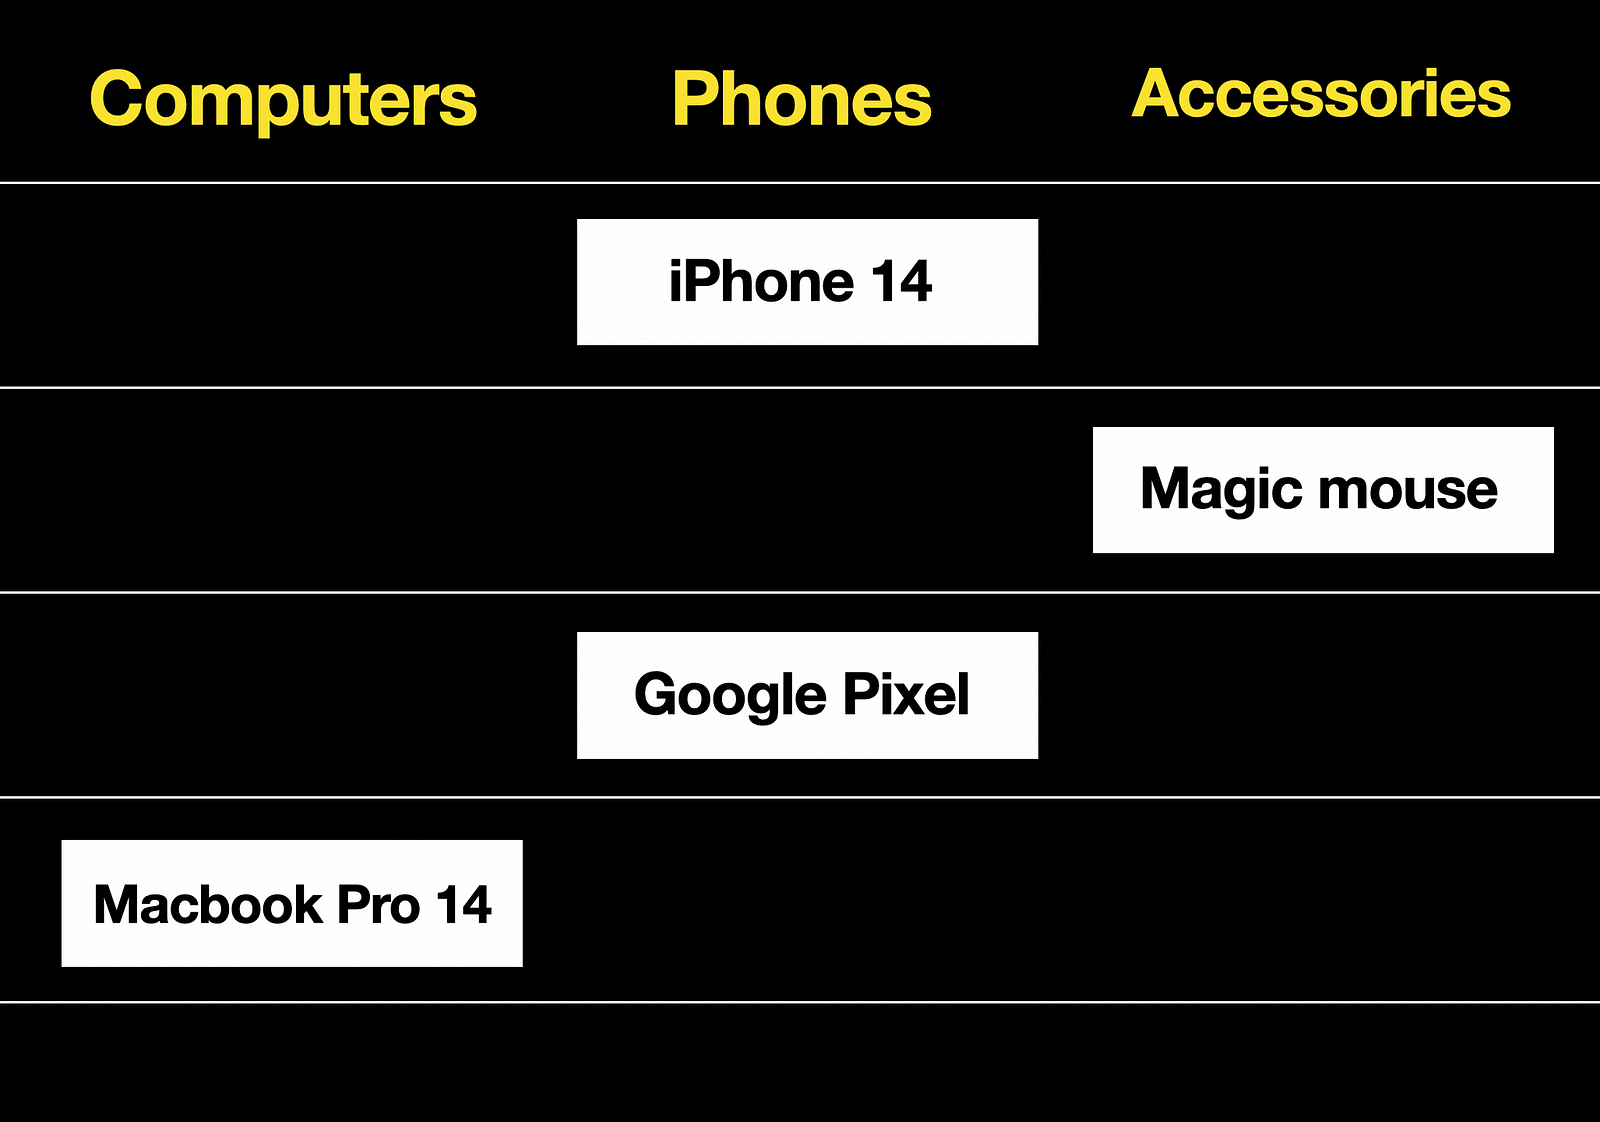
Here is how a card-sorting exercise works. Suppose you design an e-commerce website that sells electronics. You write items on cards, define certain categories, and ask test participants to sort cards into categories.
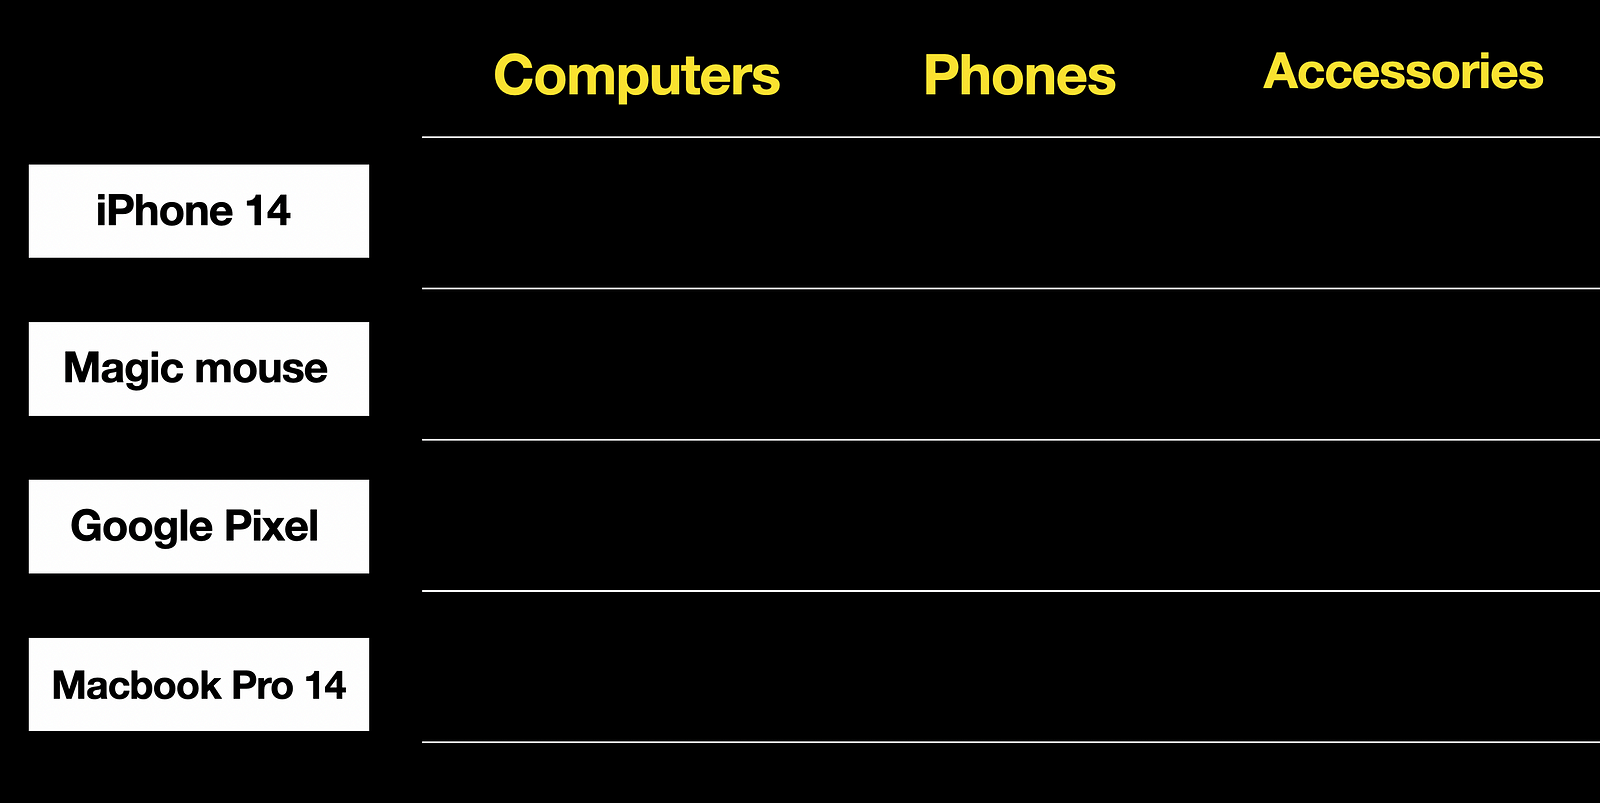
And test participants will group the items according to the categories. It is also possible to leave categories open-ended so participants can create their own categories that make sense to them.
Step 6: Create a sitemap
Based on the content groups you’ve established in the previous step, you can create a sitemap, a visual representation of the content available on your website or in your app. The sitemap contains parent and child pages. It helps us see the hierarchy of content and structure of the overall website or app — what leads to what.
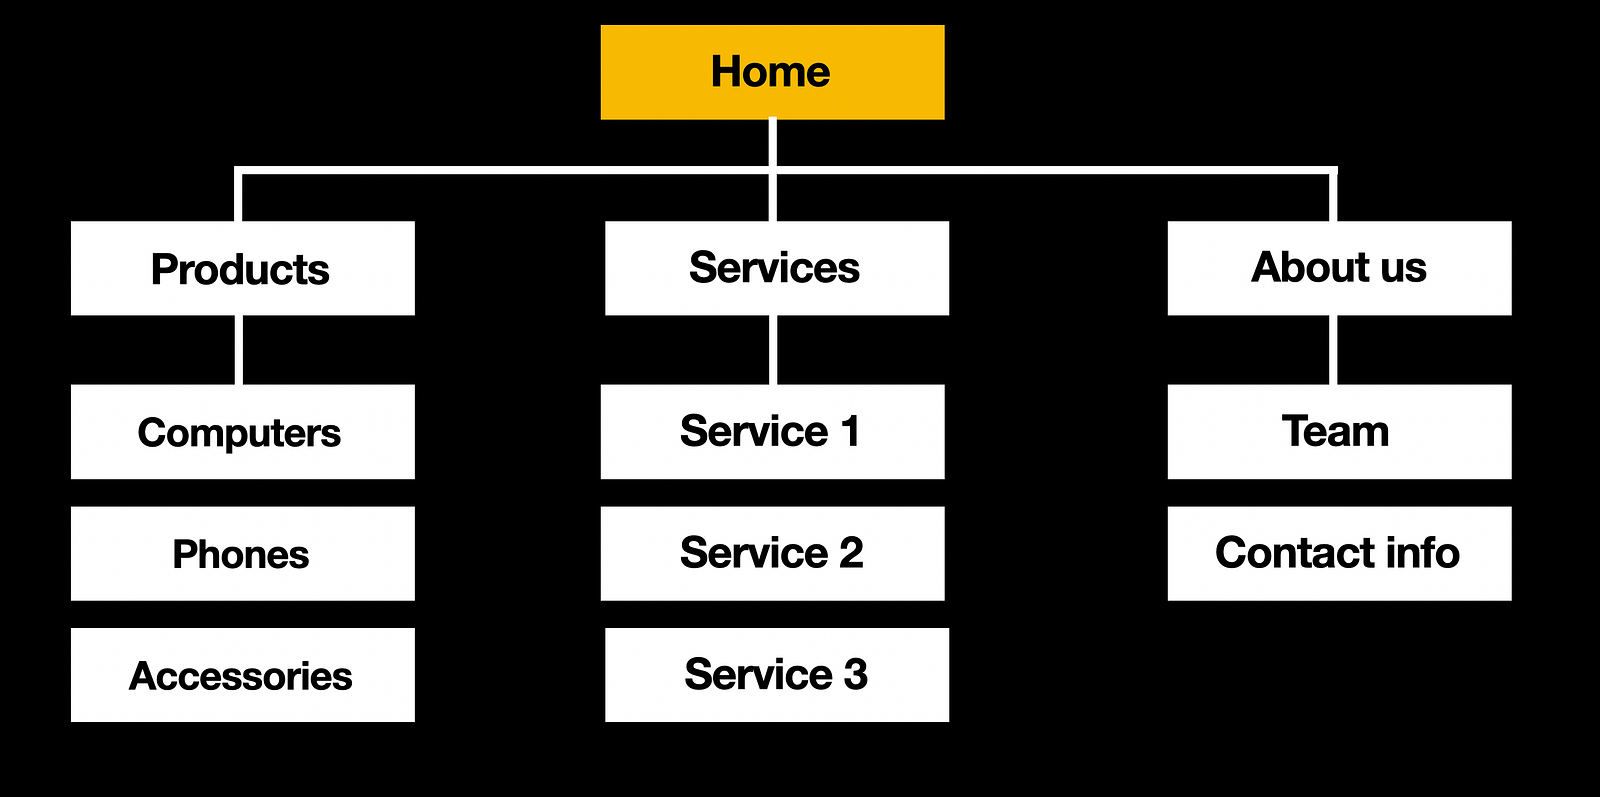
A sitemap should not be fancy; you can create it using tabs like in the example below. This format works well when you need to communicate the structure to other people.

Step 7: Label content
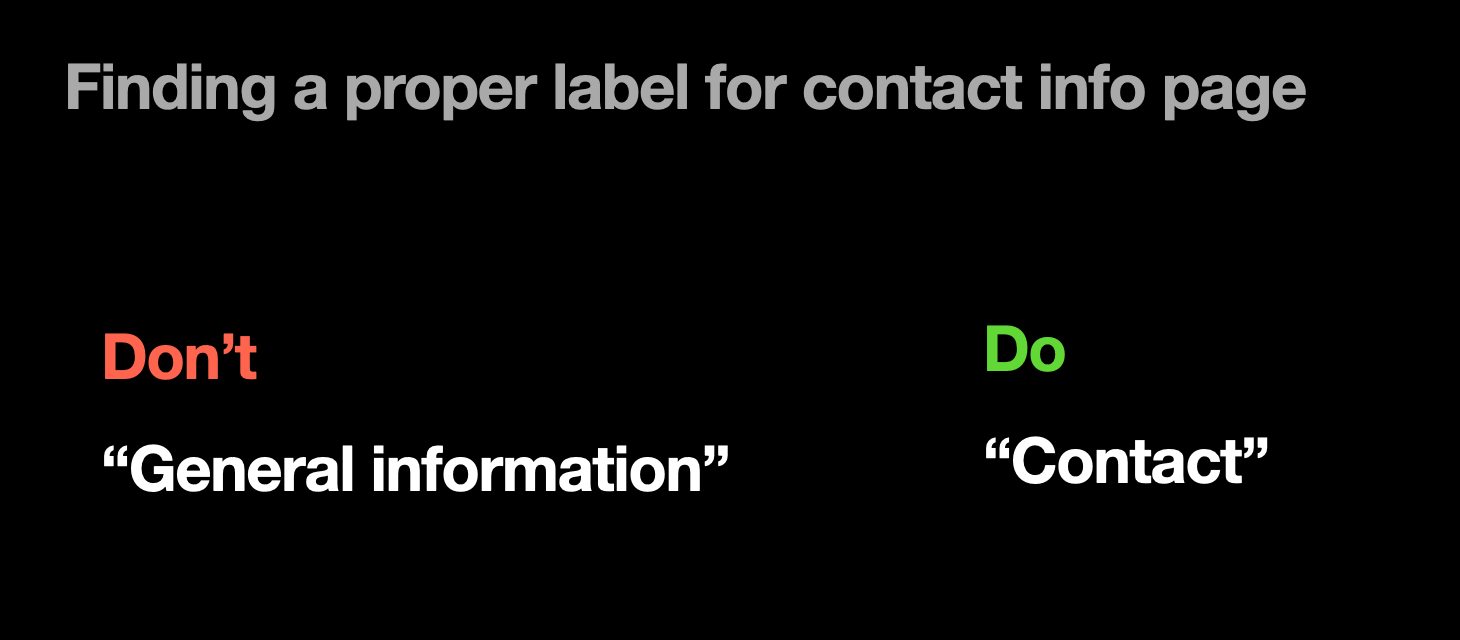
Labels will help people orient themselves on your website. A label can be a page name, the name of a category in the menu, or a section name. Labels tell users what they can expect when they choose a particular option. For example, when users see a category with the label ‘Macbooks’, they think that when they click this category, they will navigate to a page with MacBooks.
You want to ensure that labels are clear and concise so that users can understand their meaning at a glance.
Step 8: Design navigation system & user flows
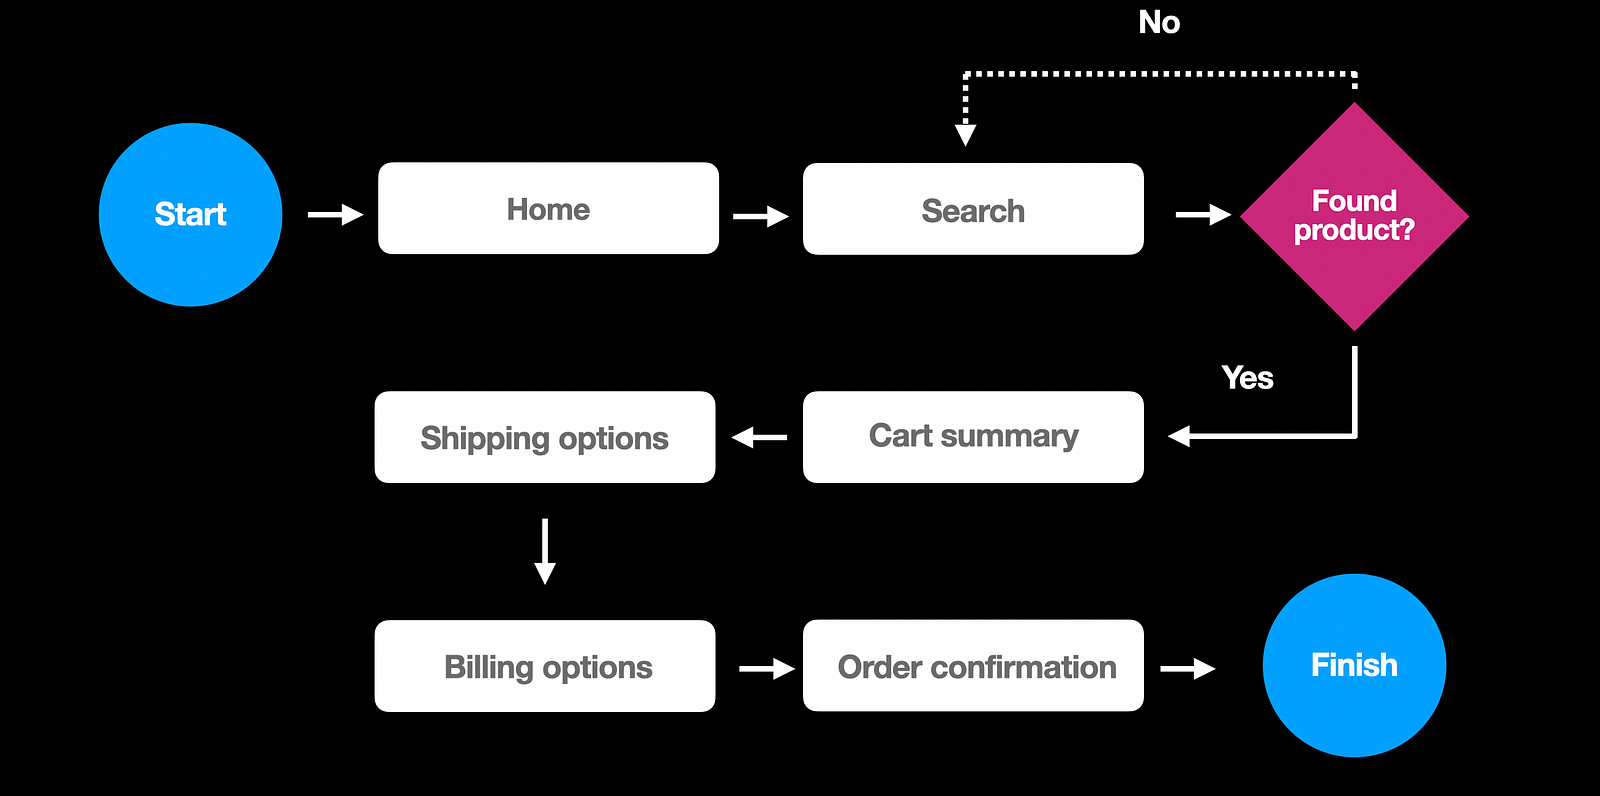
Next, you need to outline the navigation system and user flows. A navigation system will help you understand how users will navigate from A to B. It will make it evident how content on your product is interlinked and how users will navigate from one page to another. A navigation system will include menus, breadcrumbs, and internal links. Your goal in this step is to establish all possible pathways users can take to navigate a particular page.
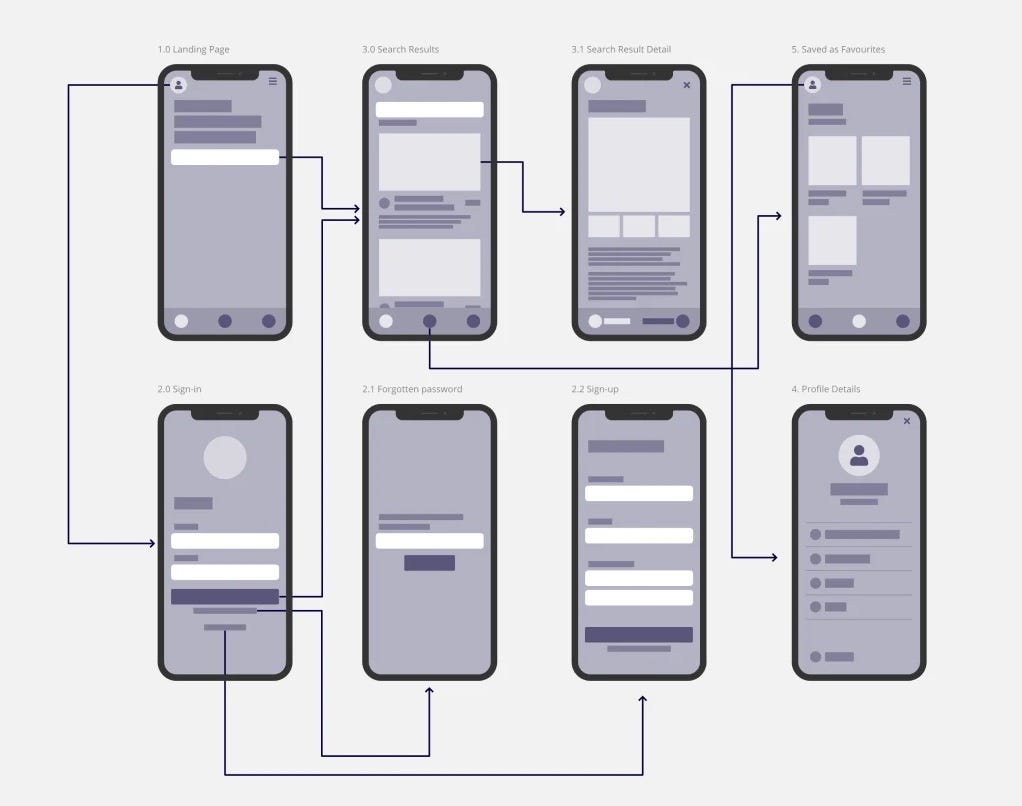
Step 9: Prototype user flow
The goal of creating a prototype is to define a visual hierarchy of content on individual pages and see how different pages work together. Visual hierarchy defines the order in which users will explore the content on individual pages. You need to ensure that the visual hierarchy you have helps users achieve their goals and, at the same time, increase your conversion rate.
Usually, IA architects create clickable wireframes that have a limited number of graphic elements because it is enough to demonstrate the hierarchy of information and navigation.
Step 10: Validate your design
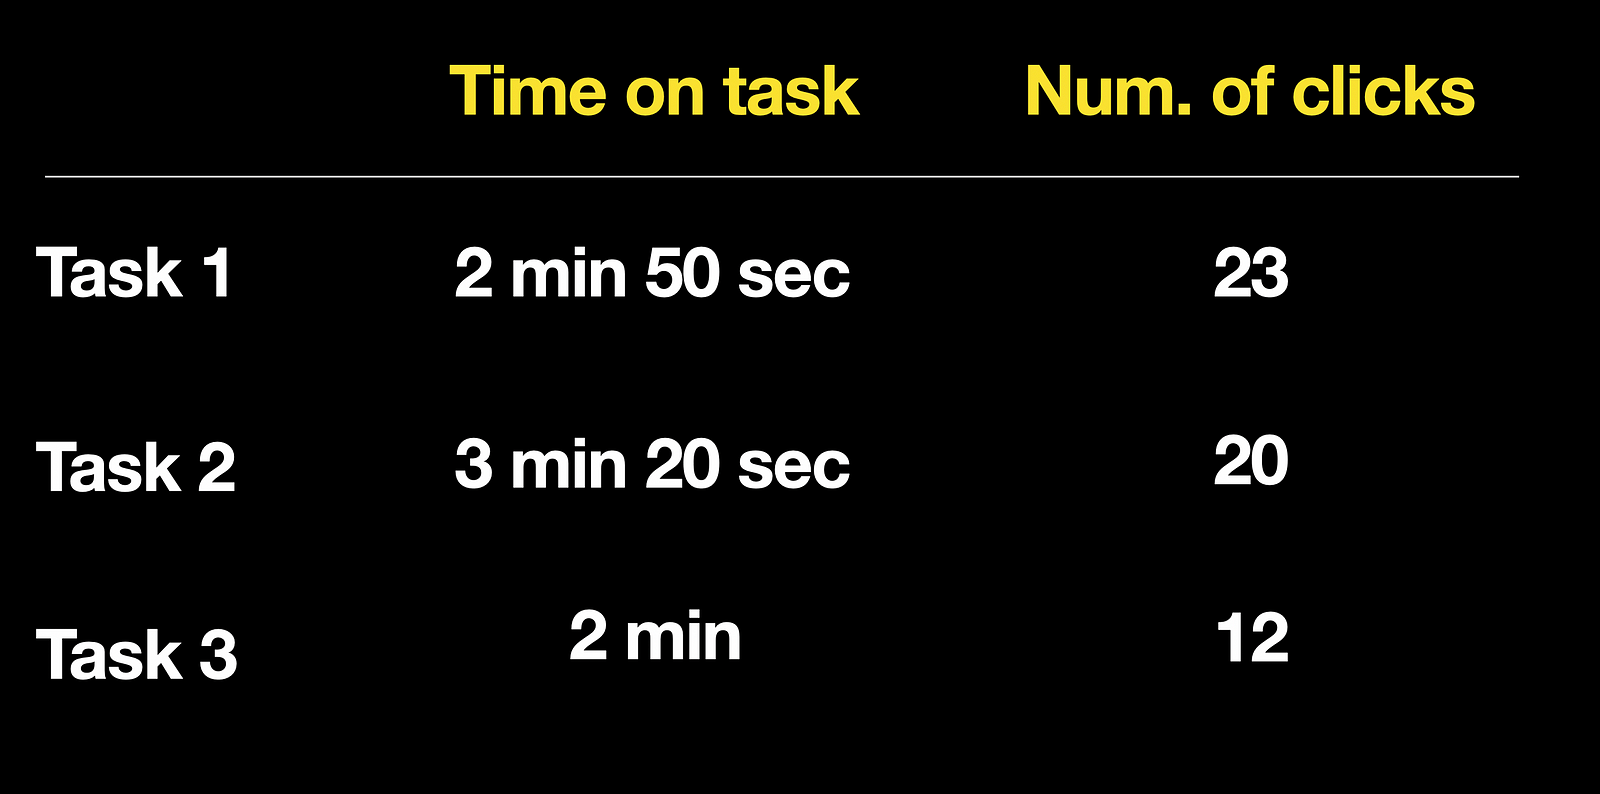
You need to conduct usability testing to ensure your users can go through your system to complete their tasks. Prepare a set of tasks, invite people who represent your target audience, and let them complete the tasks using your design. For example, if you design an eCommerce website, the task can be “Find a laptop that you like and buy it.”
You also need to define metrics for each task you want to perform. Testing will also help you identify where users need more information to make an informed decision.
Conclusion
Information architecture creates a foundation for efficient user experience. Content is the heart of every product. Well-organized content will help your users interact with your app or website, leading to a great experience.